Marketing
How to Make a LinkedIn Carousel: Step-by-Step Guide
Learn how to make a LinkedIn carousel from planning to posting, with a worked example and the exact upload steps for 2026.

İlayda Tunaboylu
Learning how to make a LinkedIn carousel is really two separate skills: designing slides that hold up on a small screen, and knowing the specific upload steps LinkedIn requires now that the format has changed. Get either one wrong and the carousel either looks unfinished or never renders as a swipeable post at all.
There’s also a structural piece most guides skip past. A carousel isn’t a slide deck you happen to be posting on LinkedIn, it’s a format with its own pacing rules: one idea per slide, a hook that earns the first swipe, and a close that earns a comment or a save. Getting the file format right gets your carousel to render. Getting the structure right gets it read.
This guide walks through both, from planning your content through publishing, with content frameworks you can reuse, a worked example you can copy the structure of, and the upload mechanics LinkedIn actually requires now that native multi-image carousels are gone. If you need topic ideas before you start planning, see 10 LinkedIn Carousel Ideas That Get Saves & Shares, and for the formatting rules that apply once you’re designing, LinkedIn Carousel Best Practices: 12 Rules for Engagement is a natural companion to this guide.
What Is a LinkedIn Carousel?
A LinkedIn carousel is a single post built from a multi-page document, most often a PDF, that renders as a set of swipeable slides directly in the feed. Viewers swipe left through each page instead of seeing one flat image, which makes the format suited to anything that benefits from being broken into steps: frameworks, listicles, case studies, or a point made slide by slide instead of in one paragraph. Unlike Instagram, where a carousel is a sequence of separate image files, a LinkedIn carousel is technically one uploaded document, so the whole thing shares a single caption and a single upload. Native image-based carousels were retired in late 2023, so a document upload is the only way to get this swipeable format on LinkedIn today.
Quick Answer
To make a LinkedIn carousel, plan your content as one idea per slide, generate or design the slides (an AI tool like Decktopus AI or a manual editor like Canva), export as a PDF, then upload it through LinkedIn’s “Add a document” option in the post composer. LinkedIn renders each page as a swipeable card once you publish.
Carousel vs. Multi-Photo Post: Don’t Confuse the Two
LinkedIn actually supports two different ways to post multiple images, and it’s easy to build the wrong one without realizing it until it’s already live.
A multi-photo post is what you get by selecting several JPG or PNG files directly in the standard post composer. LinkedIn displays them as a scrollable gallery, similar to a regular image post that happens to have more than one photo. There’s no document title, no page-by-page swipeable card rendering, and it doesn’t carry the same dwell-time signal a document-rendered carousel does.
A carousel, the format this guide covers, only renders when you upload a single multi-page document (PDF, PPT, PPTX, DOC, or DOCX) through “Add a document” in the composer. LinkedIn turns each page into a swipeable card with page indicators and a document title above the post, and the file stays downloadable.
If the swipeable, story-driven carousel experience is the goal, the document upload is the only path there. Selecting multiple images directly will post them together, but it won’t produce a carousel.
What You’ll Need
A content outline (a topic, blog post, or set of talking points to turn into slides)
A carousel design tool, whether that’s a fully AI-generated option like Decktopus AI or a manual tool like Canva or Figma
A LinkedIn account, ideally accessed from desktop for the upload step
Step-by-Step: How to Make a LinkedIn Carousel
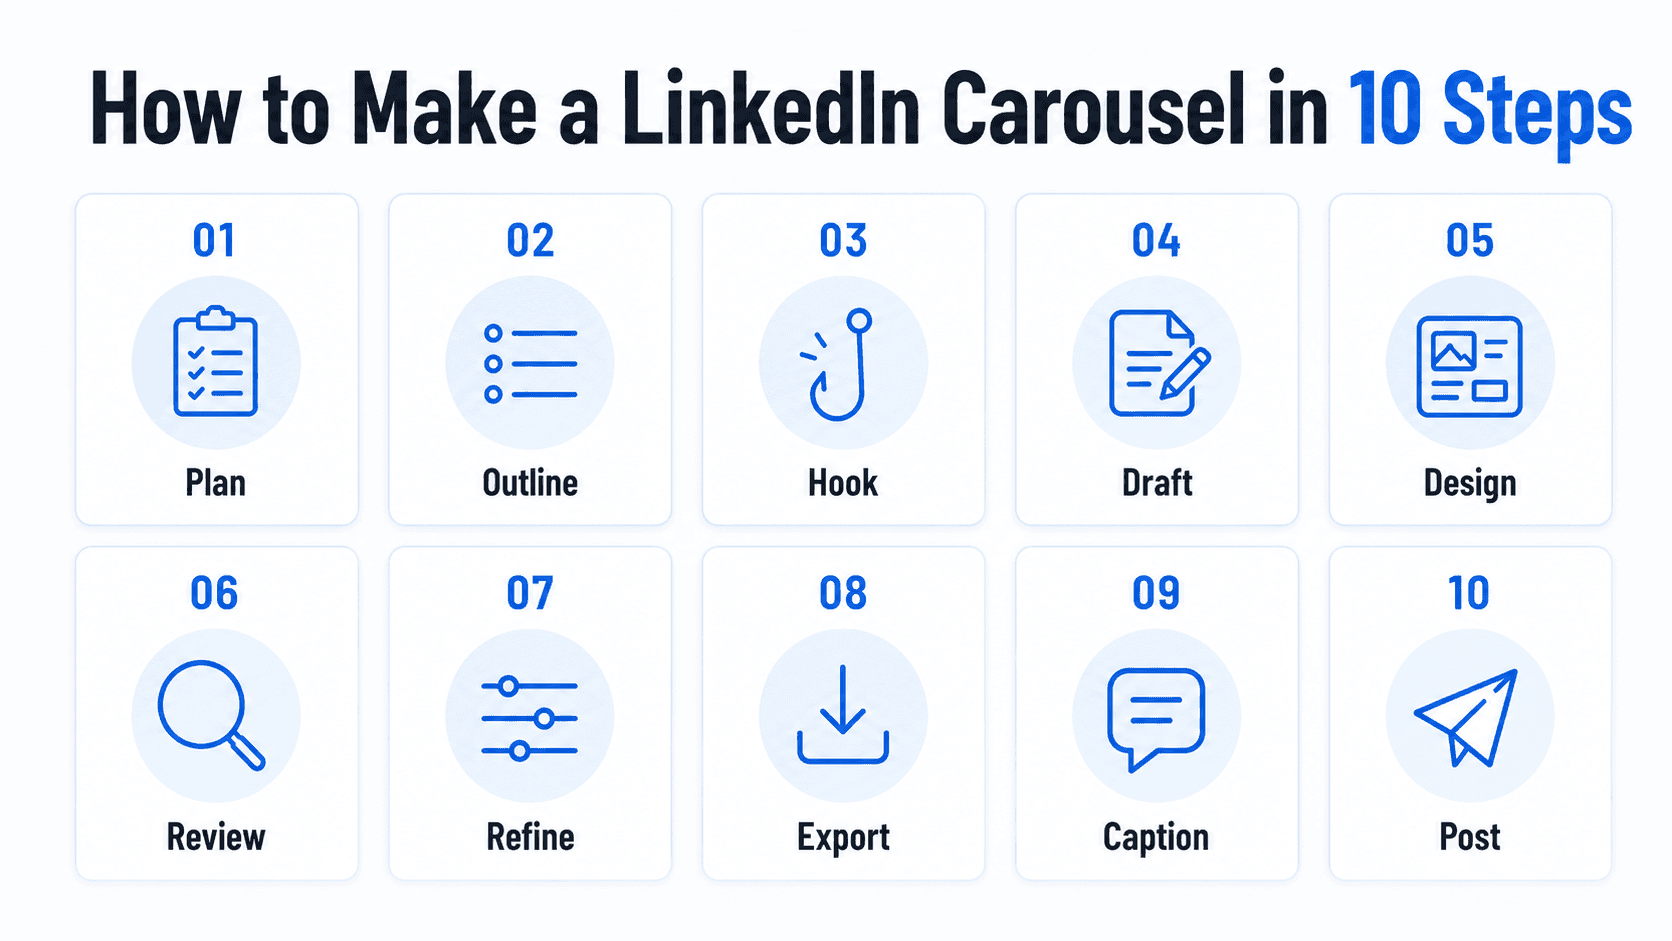
Step 1: Plan the carousel before designing anything
Outline your content first. Pick a simple structure, like problem, insight, example, action, and assign one idea to each slide. Trying to fit two ideas onto one slide is the most common reason carousels feel cluttered. Aim for 5 to 10 slides total. Shorter carousels tend to get swiped through to the end; longer ones see people drop off partway.
Before you open a design tool, write the outline as plain text first, one line per slide. If a line needs “and” to describe what’s on it (“the problem and why it happens”), that’s usually two slides, not one.
Step 2: Generate the carousel design
Give your outline to an AI carousel tool rather than starting from a blank canvas. In Decktopus AI, you can enter a prompt or upload a full document (a blog post, a set of notes, or a transcript), and the tool builds a complete, card-by-card carousel from it, with the visual design generated from scratch rather than pulled from a template. You choose the visual direction before generation: a previously used style, a Brand Import that pulls colors, typography, and your logo from your website URL, or a fully AI-generated look.
Step 3: Review the outline before you generate the full design
Decktopus AI shows a card-by-card outline you can review and edit before it builds the final design. This is the point to catch structural issues (an idea that needs to be split across two slides, a step that’s out of order) before you’re editing finished visuals. Reviewing at the outline stage is faster than reviewing a finished design, since you’re evaluating structure rather than getting distracted by color and layout.
Step 4: Refine the slides
Once the carousel is generated, you have two ways to edit it. Edit with AI lets you describe a change in plain language (tighten the copy on slide 3, swap the color accent) and preview it before applying, with undo available if you don’t like the result. Edit Text lets you make direct manual edits to the copy on any slide. Use Edit with AI for anything structural or stylistic, and Edit Text for small, exact fixes like a typo or a specific word swap.
Step 5: Export as PDF
Export the finished carousel as a PDF. This is the only reliably supported way to post a swipeable carousel to LinkedIn in 2026 (more on why in the FAQ below). Decktopus AI also supports PPT and PNG export in standard or compressed quality, but PDF is what you want for the LinkedIn upload step. Standard quality is fine for most carousels; compressed is worth using if you’re running close to LinkedIn’s file size limit.
Step 6: Open LinkedIn and start a post
Log into LinkedIn, ideally from desktop, and click “Start a post” at the top of your feed. Desktop tends to give a clearer preview of the finished slides than the mobile app does, which matters for the review step later.
Step 7: Add your document
Click the document icon in the post composer (sometimes shown as a “+” that reveals more post types) and select “Add a document.” This is the option that turns a file into a swipeable carousel; uploading regular images will not. This is the single step people skip when they’re used to the old native carousel format, and it’s why some carousels published today look like static image galleries instead of swipeable cards.
Step 8: Upload your PDF and add a title
Select your exported PDF. LinkedIn will show a preview of each slide. You’ll be asked for a document title, which appears above the carousel in the feed. Keep it short and specific rather than vague, since this title is one of the first things people see before deciding whether to engage.
Step 9: Write your caption
Write a caption that gives people a reason to swipe rather than summarizing every slide. A strong opening line, one line of context, and a light prompt to swipe is usually enough. Save the full explanation for the slides themselves. Only the first line or two of your caption show before LinkedIn truncates it behind “see more,” so that opening line is doing more work than the rest of the caption combined.
Step 10: Review and publish
Check the slide preview one more time. Confirm the slides are in the right order, text is readable at a glance, and nothing looks cut off. Then publish. Once it’s live, LinkedIn doesn’t support editing the document’s content, so this review pass is your last chance to catch a typo or a misordered slide before it’s public.
Content Frameworks That Make Structuring Easier
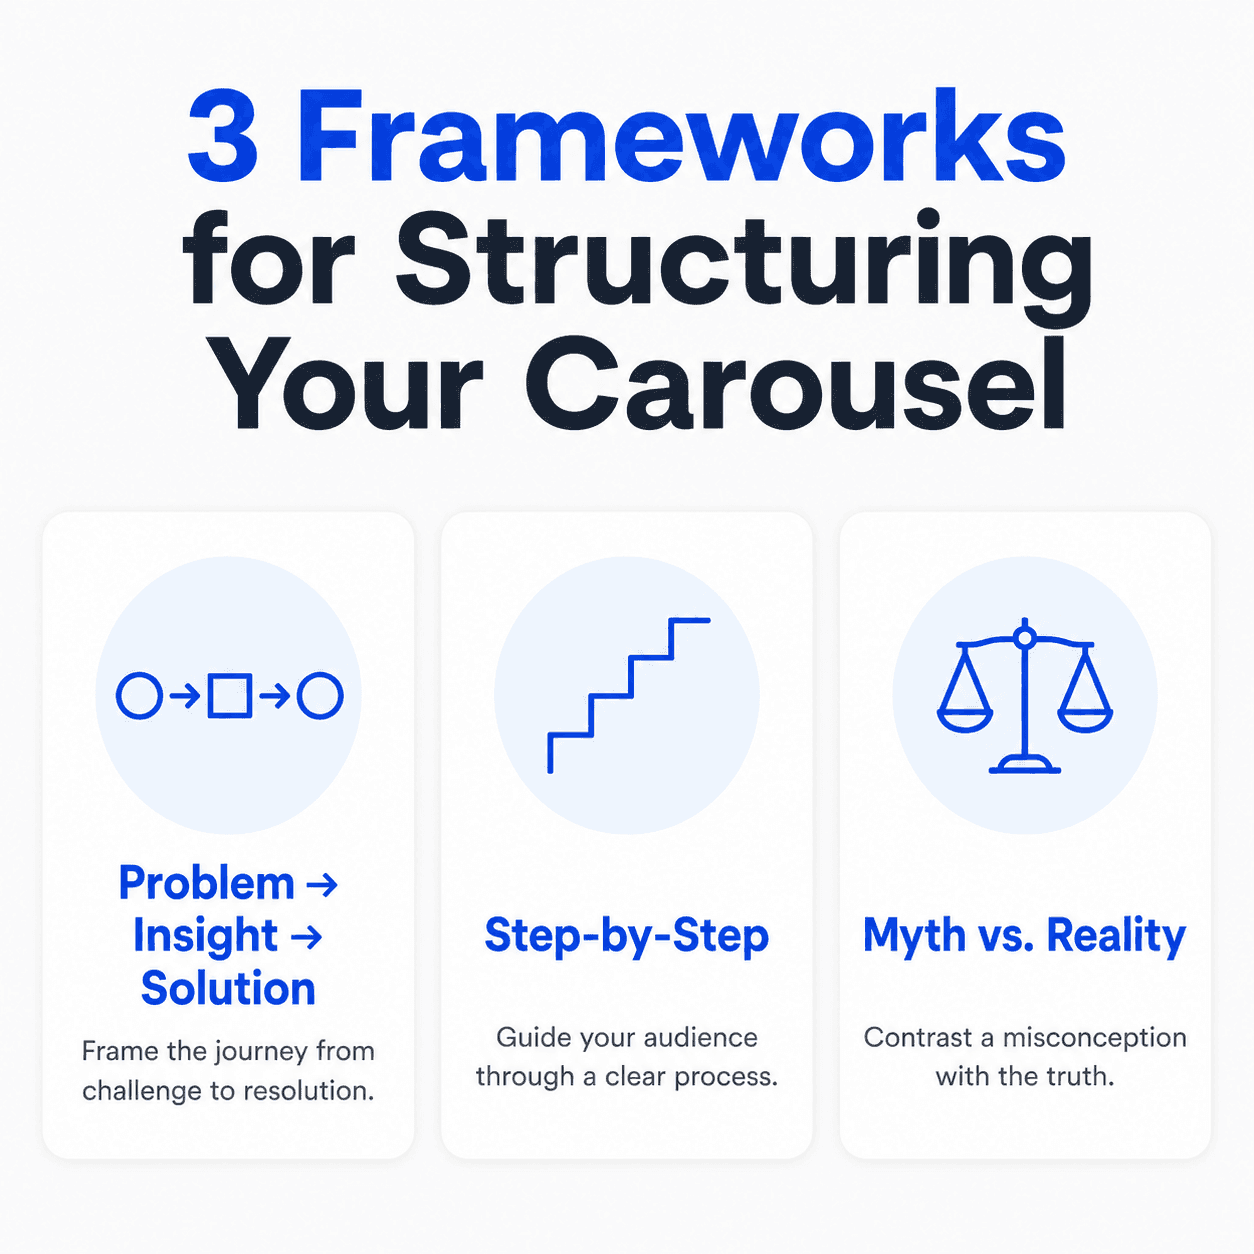
Staring at a blank outline is the slowest part of making a carousel. These three frameworks give you a repeatable shape to fill in, so Step 1 takes minutes instead of an open-ended brainstorm.
Problem, Insight, Solution. Slide 1 states a problem your audience recognizes. The middle slides explain why it happens or what people get wrong about it. The final slides offer your solution or framework. This works well for thought leadership and consulting-style content, since it validates the reader’s frustration before offering value.
Step-by-Step. Slide 1 announces the topic (“How to do X in 5 steps”). Each following slide covers exactly one step. The last slide summarizes or offers a pro tip. This is the most forgiving structure for beginners, since the slide count maps directly onto the number of steps.
Myth vs. Reality. Slide 1 names a common misconception (“Everyone thinks X about this topic”). Each following slide pairs a myth with the reality. This format tends to generate comments rather than just likes, since contrarian claims invite people to agree or push back.
Pick whichever framework matches your content best, then write your one-line-per-slide outline against it before moving to Step 2 above.
Two Tricks for Keeping People Swiping
Beyond picking a good framework, two specific techniques make people more likely to swipe from one slide to the next instead of stopping partway through.
Bridging slides visually. Design consecutive slides so a visual element, a color block, an icon, part of an image, continues or shifts slightly from one slide to the next rather than resetting completely on every card. That visual continuity creates a subtle expectation that there’s more to see, the same way a partially visible next paragraph pulls a reader further down a page.
Breadcrumbs in the copy. End a slide with a phrase that only makes full sense once you’ve seen the next one, “here’s where it gets interesting,” “the third one surprised me,” or a line that teases what’s coming without fully explaining it. This works because it creates a small, specific information gap, the same mechanism a good headline uses, just repeated slide to slide instead of once at the top.
Worked Example
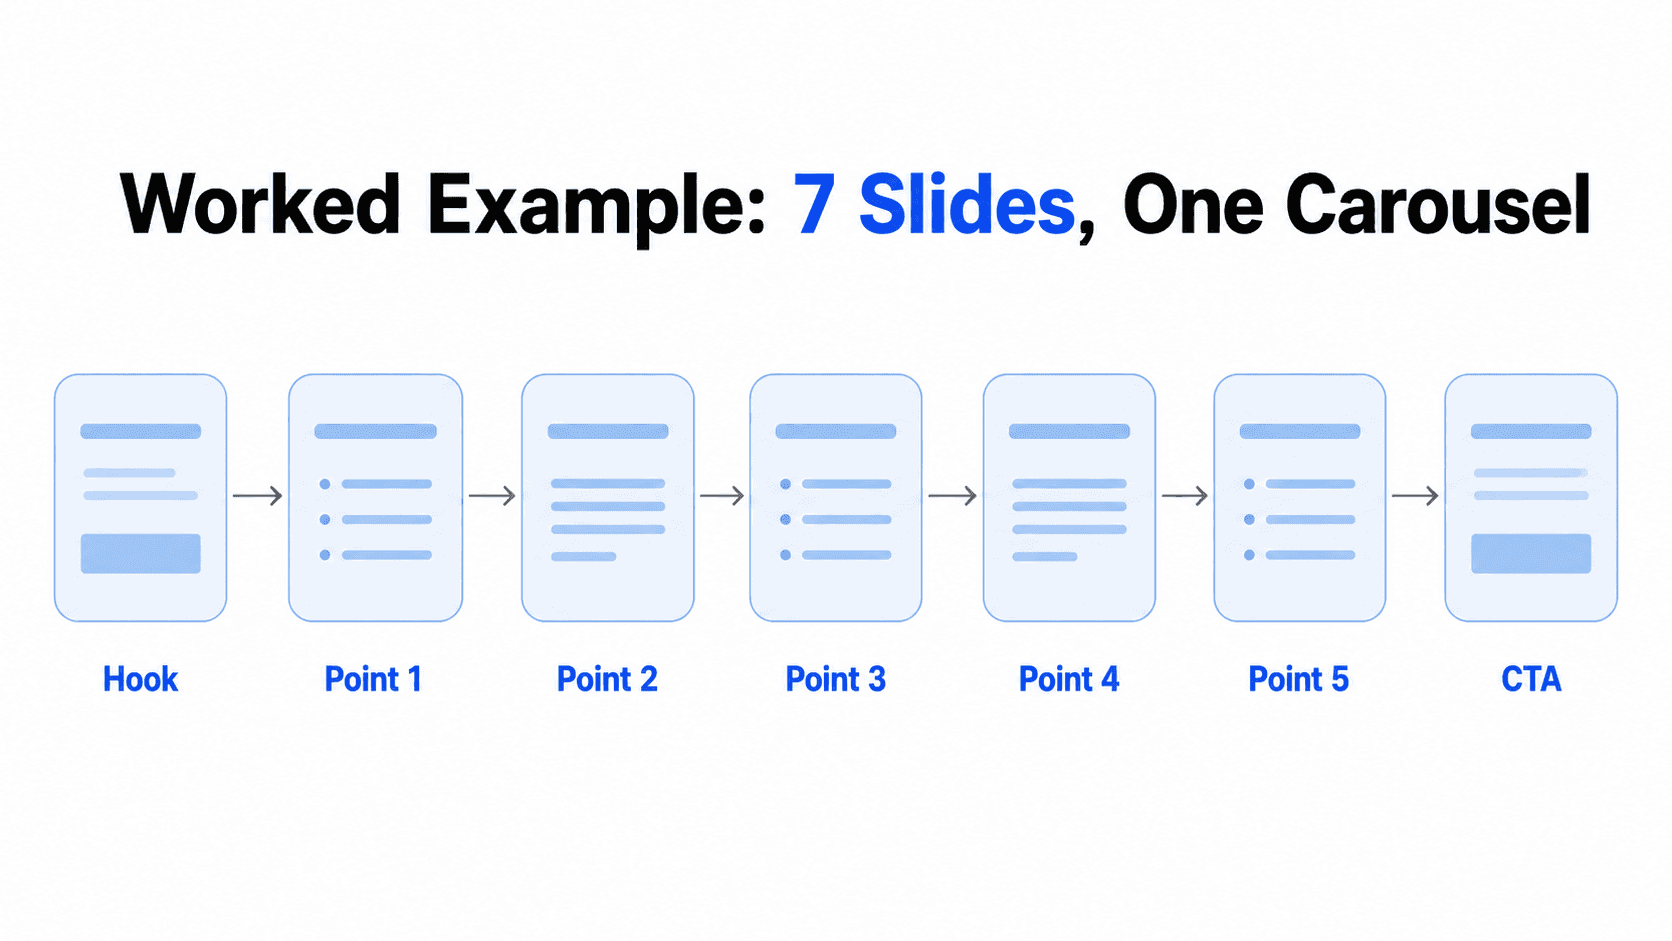
Here’s how the steps above look applied to a real topic, using the Problem, Insight, Solution framework: “3 Things Killing Your LinkedIn Reach.”
Slide 1 (hook): “3 things killing your LinkedIn reach (and nobody’s telling you)”
Slide 2 (problem): “You post consistently. Reach still drops. Here’s what’s actually happening.”
Slide 3 (insight 1): “Your first line isn’t earning the ‘see more’ click”
Slide 4 (insight 2): “You’re not getting comments in the first 60 minutes”
Slide 5 (insight 3): “Every post looks the same as your last one”
Slide 6 (action): “Fix one of these this week. Which one’s you? Comment below.”
Notice what each slide is doing structurally: slide 1 is a pure hook with no explanation yet, slides 3 through 5 each carry exactly one insight rather than bundling all three onto one slide, and slide 6 asks a specific question rather than a generic “follow for more.” That specificity is what turns a passive read into a comment.
Fed into Decktopus AI as a prompt or a short document, this outline becomes a reviewable card-by-card structure, then a fully designed carousel you can refine with Edit with AI before exporting.
Building This Carousel in Decktopus AI
Here’s what that worked example actually looks like inside Decktopus AI, from prompt to export.
1. Enter the topic. Type the six-slide outline above directly into the prompt, or paste it in as a short document if you’ve already drafted it elsewhere. Decktopus AI accepts both a topic prompt and a full document upload, so you’re not stuck typing bullet points into a text box.
2. Choose your visual direction. Pick from a previously used style, a Brand Import (Decktopus pulls your colors, typography, and logo from your website URL), or let the AI generate a look from scratch. For this example, a from-scratch style keeps the carousel from resembling a template you’ve seen in ten other people’s feeds.
3. Review the card-by-card outline. Before Decktopus builds the final design, it shows you each of the six slides as a reviewable outline. This is where you’d catch, for example, if “insight 2” needed to be split into two slides instead of one.
4. Generate the full design. Once the outline looks right, Decktopus AI builds the complete visual carousel: layout, color, typography, all generated from scratch rather than dropped into a template.
5. Refine with Edit with AI. If slide 4’s phrasing feels off or the color accent on slide 1 needs to pop more, describe the change in plain language. Decktopus previews the edit before applying it, and undo is available if it’s not what you wanted. For small manual tweaks (fixing a typo, swapping one word), Edit Text lets you edit directly.
6. Export as PDF. Standard or compressed quality, PDF for the LinkedIn upload. From here, it’s Steps 6 through 10 above: open LinkedIn, add the document, upload the PDF, title it, caption it, and publish.
Ready to build your own version of this? Start your LinkedIn carousel on Decktopus AI and walk through these same steps with your own content.
LinkedIn Document Post Limits
Requirement | Limit |
|---|---|
Supported file types | PDF, PPT, PPTX, DOC, DOCX |
Maximum file size | 100 MB |
Maximum pages | 300 pages |
Upload method | Document post (“Add a document”) |
Native image-based carousels | Not supported (retired late 2023) |
These are LinkedIn’s hard platform limits, not performance recommendations. A 300-page document will upload fine; it will not perform like a tight 6-to-10-slide carousel. Exact recommended slide dimensions for LinkedIn versus Instagram differ and deserve their own breakdown.
For the exact pixel dimensions, file size limits, and safe zones behind these numbers, see the LinkedIn Carousel Size, Dimensions & Format Guide 2026.
Common Mistakes That Kill a Carousel’s Performance
Uploading images instead of a document. LinkedIn only renders a swipeable carousel from a document upload (PDF, PPT, PPTX, DOC, or DOCX). Uploading separate image files creates a static image gallery, not a swipeable card format, even though both look similar in the composer.
A weak or vague first slide. If slide 1 reads like a title page (“My Thoughts on Marketing”) instead of a hook, most people won’t swipe past it. The cover slide’s only job is to earn the next swipe, not to summarize the carousel.
Cramming two ideas onto one slide. This is the single most common structural mistake. If a slide needs “and” to describe its content, split it into two slides.
A caption that repeats every slide. If your caption explains the whole carousel before someone swipes, you’ve removed their reason to swipe. Tease the value; don’t spoil it.
Skipping the final review before publishing. LinkedIn doesn’t support editing a document post’s content after it’s live. A typo or a misordered slide caught after publishing means deleting and reuploading, not a quick fix.
Can I Schedule a LinkedIn Carousel?
Yes, natively. LinkedIn added a native scheduler, the clock icon in the post composer, that works for document posts including carousels. It has real limits though: you can only schedule up to 3 months out, there’s no bulk scheduling (each post is queued one at a time), no switching between multiple company pages or accounts from inside the scheduler, and no built-in approval workflow if you’re working with a team. For anything beyond those limits, a third-party scheduling tool that supports LinkedIn document posts fills the gap. Decktopus AI itself doesn’t include scheduling or publishing; it generates and exports the carousel, and posting happens separately through LinkedIn’s native scheduler or a third-party tool. LinkedIn’s help center has the current specifics on scheduling limits if they change. If you’re posting to LinkedIn alongside other platforms, managing multiple social media accounts without a system is usually where scheduling workflows start to break down.
How to Know If Your LinkedIn Carousel Actually Worked
Publishing is the easy part. Knowing whether the carousel you just built actually did its job takes checking a specific set of numbers, not just watching the like count for a day.
Start with impressions, but treat them as context, not a verdict. Impressions tell you how many people saw the post in their feed. A carousel with strong impressions and weak everything else usually means the topic or timing worked but the slides themselves didn’t hold attention.
Comments and saves are the two numbers that matter most for a carousel specifically. Saves mean someone found the content valuable enough to come back to, which is a strong signal the structure (Step 1’s outline, the frameworks above) actually delivered on the hook’s promise. Comments mean the closing slide’s call to action was specific enough to act on rather than a generic “follow for more.” If either number is consistently lower than your other posts, that’s the place to look first, not the topic itself.
Compare against your own past carousels, not a general benchmark. LinkedIn engagement varies too much by audience size, industry, and posting frequency for an external number to mean much. What’s useful is whether this carousel’s saves, comments, and profile visits beat your last few, since that comparison controls for your specific audience.
Check profile visits and new followers tied to the post, using LinkedIn’s native post analytics (available directly on the post, or through your Creator or Company Page dashboard). A carousel that converts views into profile visits is doing more than getting seen; it’s building the kind of recognition that compounds if you keep posting.
If a carousel underperforms, trace it back to a specific step. Weak saves usually point back to Step 1 (the outline wasn’t specific enough) or the framework choice in the Content Frameworks section above. Weak comments usually mean the caption or closing slide defaulted to something generic. Treating a flat carousel as a diagnostic question, rather than just moving on to the next topic, is what actually improves the next one.
FAQ
Can you still post carousels on LinkedIn in 2026?
Yes, but not the way it worked before. LinkedIn retired native multi-image carousel uploads in late 2023. The only way to publish a swipeable carousel now is to upload a multi-page document (PDF, PPT, PPTX, DOC, or DOCX). LinkedIn renders each page as a swipeable card in the feed.
What file format should I use for a LinkedIn carousel?
PDF is the most reliable choice. LinkedIn also accepts PPT, PPTX, DOC, and DOCX, but PDF renders most consistently across desktop and mobile.
How many slides should a LinkedIn carousel have?
Most guides and creators converge on 5 to 10 slides. LinkedIn’s platform limit is much higher (up to 300 pages), but that’s a hard limit, not a performance recommendation. Carousels that run long tend to see people drop off before the final slide.
Can I make a LinkedIn carousel on mobile?
You can upload and publish a carousel from LinkedIn’s mobile app, but designing one on a phone is impractical. Build the carousel on desktop, then upload from either desktop or mobile.
Do I need design skills to make a LinkedIn carousel?
No, not if you’re using a tool that generates the design for you. Decktopus AI builds the full visual layout from a prompt or document, so the manual design step that tools like Canva or Figma require isn’t necessary.
Can I edit a LinkedIn carousel after it’s posted?
No. LinkedIn doesn’t support editing a document post’s content after publishing. If you spot an error, you’ll need to delete the post and upload a corrected version.
What should the caption say?
Lead with a hook that names the problem or promise, add one line of context, and let the slides carry the actual value. Avoid summarizing every slide in the caption; that gives people a reason to skip the swipe entirely.
Which content framework should I use for my first carousel?
Step-by-Step is the most forgiving for a first attempt, since the slide count maps directly onto the number of steps in your process. Problem, Insight, Solution works well once you’re comfortable with pacing and want to build more narrative tension.
Does a LinkedIn carousel need a specific number of slides to perform well?
There’s no fixed number that guarantees performance, but 5 to 10 slides is the range most creators and guides converge on. The better rule is that every slide should earn its place; if you’re padding to hit a slide count, cut instead.
How do I know if my LinkedIn carousel actually performed well?
Compare saves, comments, and profile visits against your own past carousels rather than an external benchmark, since engagement varies too much by audience and industry for a general number to be useful. Saves signal the content was worth bookmarking; comments signal the closing slide’s CTA was specific rather than generic.
Still comparing tools before committing? Best LinkedIn Carousel Generators 2026 lines up the options side by side, and Free LinkedIn Carousel Templates for 2026 covers pre-built layouts if you’d rather not generate from scratch. Posting the same content to TikTok too? The TikTok Carousel Guide covers what changes for that platform.
Conclusion
Making a LinkedIn carousel comes down to getting the structure right before you design (one idea per slide, a clear hook, a real ending), then getting the file right before you post (PDF, uploaded through “Add a document,” not as separate images). Get both right and the format does what it’s built to do: hold attention longer than a text post and give people a reason to swipe to the end.
Ready to build one? Start a carousel on Decktopus AI, or see the full feature set on the carousel maker landing page.
Related posts

How AI Voice Agents Help Sales Teams Prepare and Deliver Better Presentations
Learn how AI voice agents help sales teams turn call insights into focused slides, stronger delivery, and more confident customer presentations at every stage.
Marketing

Instagram Carousel Size & Dimensions Guide (2026)
Instagram carousel size in 2026: exact dimensions for square, portrait, and landscape, plus file limits and safe zones, verified across sources.
Marketing

LinkedIn Carousel Size, Dimensions & Format Guide 2026
LinkedIn carousel size in 2026: exact dimensions, file limits, aspect ratios, and formatting rules so your slides never get cropped.
Marketing